2/28/2011

Have you heard of Oliver+S? They have some cute patterns (most of them are girl but their boy ones a very versatile and cute too!). Anyways their Bedtime story pajamas is one of their best sellers, unfortunately it is now out of print.

http://www.oliverands.com/images/product/model/OS008BT1.jpgOliver + S Bedtime Story Pajamas


But I have some good news! If you would like to make them and do not have a pattern you can make a mock one for...FREE! (except for the fabric of course ;)

Go to habitual and get her free kimono pattern and then use Mades pants tutorial
for the bottoms and voila! You have your very own kimono/bedtime story pajamas! And it only cost you the fabric!


2/26/2011

Sew Boy Week 4

Sew Boy Week 4
I can't believe its time for another Sew Boy!

binkiesandbriefcases has this great idea for turning a sweater into a stuffed animal!
Go here to check it out.


Alisa Burke made these adorable monster lunch sacks for kids.
Check out the tutorial!


Just another day in paradise has a tutorial for cuff watches, I really love this kind of watch!
Check it out!


Mushroom village made the cutest caps!
She has a tutorial here.
Eddie and the Cap


Patterns you can buy:
The tuxedo bib would be so fun to take when you go somewhere special or just to make meals feel more upscale!
The Tiny Tuxedo and Suit Bib Tutorial


Make it and Love it has a great pattern for boy booties, I love little baby shoes and finally there are cute ones for boys!

Image of Bradley Baby Booties - PDF sewing pattern

Mcalls has this very basic boys shirt, vest and pants pattern M6222.
This is a good boys pattern it has basics but with your fabric choices can be very versatile.
M6222
I really wish they would take better pictures on regular patterns.
I mean can't they make them look good?

2/20/2011

Quilts

My two oldest needed new blankets for their beds Being all crafty I decided to make some.
I don't usually like character themed rooms or anything, but they wanted their favorite characters so bad.....and then I thought what the heck? They will never be this age again and want Scooby-Doo and Cars blankets, so I let them choose the fabric they wanted.

I learned a few things the very first of which is I am NOT a quilter! I cut out two pieces and was so tired that I decided to just use the whole length and sew some extra to the other side.


I like contrasting thread on the back.
I used a free-motion foot to quilt them, the results were good, they could have been better but I was very impatient.


See the end of the yellow fabric? I looks different but I actually really like it.


I used two different methods of binding each using the machine, lets face it I'm just not going to hand-bind my quilts! The method I liked best is the one Ashely from Make It and Love It uses, here.

2/19/2011

Sew Boy Week 3

Here it is Sew Boy week 3!

A pretty cool life has an awesome belt tutorial! Perfect for keeping your child's pants up or just for looks!


Sew Much Ado has this pretty cool army tent for any boy! She explains what she did so be sure to check it out.


On Craftster, Dooney gives us a quick-n-dirty Romper from a t-shirt!
SO cute right?


Lightbluegrey made this absolutely adorable stick horse! Here is the tutorial!


This week I decided to add a section for patterns you can buy for boys.

First up is Ottobre if haven't heard of them then you are seriously missing out, (I'm in no way being compensated for this)! They have some of the cutest and most unique boys patterns out there! You can subscribe or buy one issue, all the patterns and sizes are included in a fold out.
Click here to check out this magazine.
http://www.ottobredesign.com/lehdet_js/2010_6/sivut/4.jpg


Kwik Sew is a great pattern company their instructions are explained very well.
Pattern 3113 (shown below) is a very basic pattern that can be tweaked for serious cuteness, can you imagine a faux leather jacket for your boy?
K3113, Jacket & Pants

Heidiandfinn has a cute military shirt pattern.

Little Military Shirt pattern and tutorial PDF 12m-6t slim fit shirt boys

2/16/2011

Celebrate the boy

Have any of you checked it out? I was really excited by the pants tutorial on Made yesterday and the fabric ideas on Made by Rae today!

One of the best sites for boy clothing ideas is I am Momma Hear Me Roar.
She has great tutorials for bleach pen T-shirts and fabric markers for embellishing shirts it really is amazing the ideas she has!


2/14/2011

Stuffie, Boys shirt and a Failure

Remember the Marie skirt? Yeah I tried to make it and I completely failed. It looks horrible. Good thing I used some old fabric as a test dummy so I didn't ruin the pretty fabric I bought! I'll try it again later and see if I can do it right next time.


I found a pattern for this cute owl and I love it!
I'm not sure what I will do with it, but its cute.


B's Valentines shirt It had some really faded words on the front so I printed this out and sewed it on top them.

Celebrate the boy starts tomorrow (see buttons on right side)!! I'm so excited! Last years had so many good ideas, I really hope there are more clothing ideas though because that is what is hard to find.

2/12/2011

Sew Boy Week 2

Are you ready for Sew Boy week 2?

From Running With Scissors
Asymmetrical Hipster Hoodie it is such an original idea, I love it!
Go here to purchase the pattern.


Nancy's Couture gives us T-shirt Trunks,
I have seen a lot of tutorials for similar ideas, but this one looks the best and she has a free pattern.


Dragonfly Designs
has this awesome tutorial for cute monster-dolls any boy would LOVE!


Saltwater Kids
Has a great tutorial for shorts from a shirt, look how stylish they look!
073frankies 4thbday1

And don't forget that Dana from Made and Rae from Made by Rae is having Celebrate the boy starting on the 15th!


2/10/2011

Valentines ideas

Made by Rae has a great idea for a heart garland! So easy and it looks great too!


I Heart Katie did idea for valentines so cute check it out:


Can't forget Dana from Made, I made these for my sons friends this year!


From the Purl Bee cute little heart barrettes


From a girl and a glue gun cute and easy V-day bags:


What are you going to make?

2/09/2011

How to make your own fabric

I found this recipe on the internet. By doing some research I found the person who came up with the recipe (not where I found it), queenofdiy here.

Do you want to make your own fabric? You can use it for all kinds of things! Personalized pillows, beanbags or make appliques for a t-shirt. I will show you how! Warning: There a lot of photos but it is not hard. In fact I did this in just 60 minutes, maybe less if you aren't taking pictures ;)

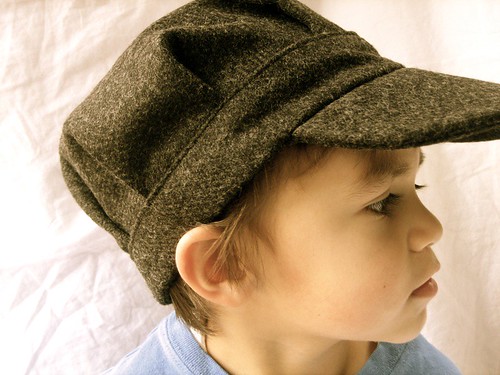
For this tutorial I made a Louis L'Amour (my brother loves him) applique for my new nephew was just born.


The stuff needed:
Inkjet printer (NOT a laser one)
Washing soda
Alum (found in the spice section)
liquid fabric softener
freezer paper
cotton fabric (The size of regular printer paper, 8 ½ x 11)
onesie
Optional: Interfacing


First so your image won't bleed when washed you need to make (or buy) bubble jet.
Mix 2 tablespoons of Alum (found in the spice section of your grocery store)
2 1/2 teaspoons of Washing Soda (found in the laundry section)
1/2 teaspoon of liquid fabric softener.
1 Cup hot water
Mix it in a big bowl (2-3 quart size) it will foam when you add the water. Stir.
After a few minutes the foam will disappear. Soak your 100% white cotton fabric in your solution for 15 minutes. Squeeze out all the liquid in the same bowl (you can use it again). Then squeeze out again and dry, either by air or in the dyer.


Now get your freshly dried cotton fabric and iron it smooth (it will have a little residue like feel to it, thats fine).
Then measure freezer paper to a regular piece of paper and cut to fit. Your fabric should already be about this size.


Lay your freezer paper, shiny side down, on top of your fabric. Align as best you can.


Next iron it together. The freezer paper will act as a stiffener and make it so your fabric will feed through the printer. Ironing makes it stick together really well. Try to not make any bubbles or wrinkles. Iron it one more time just to make sure it is together. Cut any over hang and make it as even on the edges as possible.


It should be like one piece of paper when done.


Get your image ready. I like to use the print with preview option. Practice with regular paper first, to make sure your printer is on all the right settings and so you can see how to line up your fabric.


Load your paper into your printer. Make sure the fabric is facing where the printer will print. You don't want to print your image on the freezer paper. Press the print button. You might need to watch it and help keep it straight, mine was curling at first so I put my hand lightly on the paper to help it be flat.


Here it is! Your very own unique fabric! I didn't use the proper setting the first time so I sent it through again ;)

*EDIT* Once your image is on the fabric, wait 20 minutes*(if you are using generic ink cartridges, leave the print overnight). Remove Freezer Paper. Rinse by putting some cold water and a little fabric softener in a bowl, put the fabric straight in and give it a quick swish. At this point, you will lose some of the color. Wring out the excess liquid and air dry.

When dry continue with the following steps:

Next peel, cut and pin. The freezer paper makes it peel really easy. Cut it to the size you want, I just cut it around the image. Pin it to where you want it on your shirt (or whatever you are doing with it). If you are pinning it to something knit like me be sure not to stretch it (the shirt).


This is where the optional interfacing comes in. I pinned mine to the shirt but I was afraid it would stretch to much on the back so I ironed interfacing on the inside (you could do it on the back of your image instead), use the pins as a guide.


Last step, sew! I was careful to make sure I didn't stretch anything or it would end up wavy. At each corner stop, lift the pressure foot with the needle down and resume after turning it.


Here it is your cute shirt all finished!!!!
This could be used for pictures if you are making a quilt, a personalized soft book and even fabric blocks with family pictures on them! The possibilities are endless!