3/28/2011

My Next Big Project

We have been given a love seat and sofa to use in our semi formal living room (is anything formal with kids?).
I love the shape but they desperately need recovered. I am too intimidated to reupholster them, so I will be attempting to make a slipcover. Any tips?
PS. Don't you love our royal blue carpet, yeah me too ;o)

3/26/2011

Sew Boy Week 8

Another Week of Great finds for boys!

The project corner made this cute car mat/quilt, check out part 1, 2 & 3


Whip up has this tutorial for your own Bat mask!


Obsessively stitching made a superhero cape out of a dish towel! Cute for gifts or even party favors at a superhero themed party, dish towels are cheap at $1 stores!

Shwin & Shwin shows how to re-size a polo shirt for your little guy, check it out!


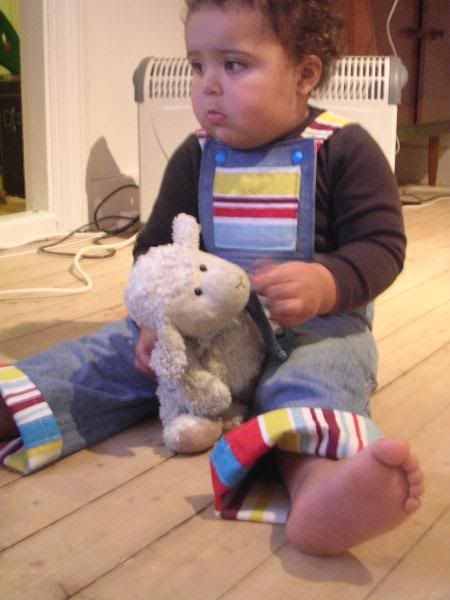
Made by Petchy shows how to make your own dungarees (aka overalls)!


Free Patterns:
Homespun threads has some very AWESOME free patterns and tutorials, check them out!


If you have an idea you would like me to feature or found a great pattern/tutorial please email me and let me know!
seemesew@gmail.com

3/24/2011

Birthday Gift

B was invited to a birthday party for a little girl in his class. He wanted to make her a doll but I already had this cape cut out so this is what we gave her instead. It looked to plain like this though, so I added some pizazz.

Even B liked it better this way,
Normally I try to use the first letter of their name but I wasn't sure whether her name started with a K or a C we didn't get a card with her name on it.

3/19/2011

Sew Boy Week 7

Sew Boy is going to be good today!!!

Nancy's Couture made an adorable outfit in Arglye, I mean how cute is he? Go here.


Sew Much Ado has an Awesome tutorial for this 4 in 1 bucket hat, perfect for the summer months coming up.
(plus her boy is sooo cute!)


I think Ginger cake has the coolest messenger bag that is also a car mat!
Go here to check it out!


Living with Punks has a free pattern for a mini me apron set,
I think boys and girls would love!


Patterns to Buy:
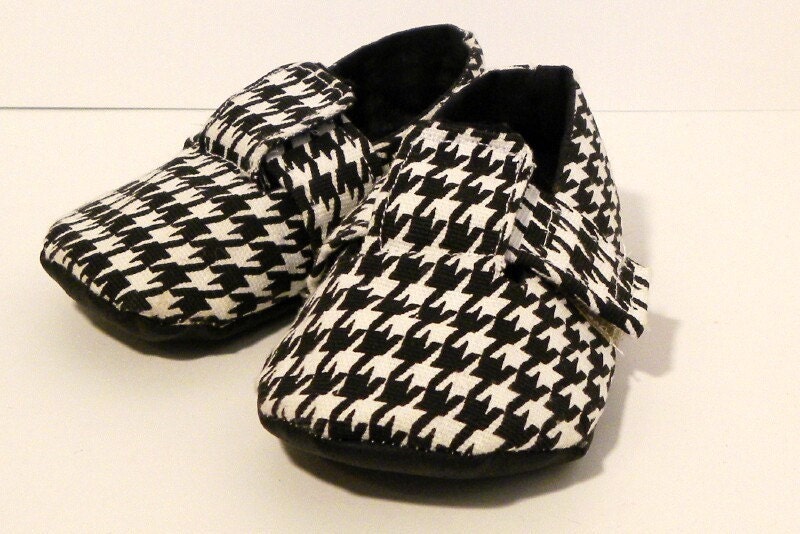
These little London Loafers are so dang cute! I want to make them,
to bad my kids feet are so big :(
Little London Loafers DIY Sewing Pattern PDF Download Baby Shoes in 6 different sizes 0-18 months


Here are some cute skater boy shorts! They even go up to a size 61


If you have an idea you would like to share, know of a pattern or found a great tutorial please email me at:
seemesew84(at)gmail(dot)com

3/18/2011

Lastest Projects

Pj's for my littlest son, it gets so hot here in the summer I think these will be perfect!


T-shirt for my hubby using my Boys T-shirt tutorial. It was my first attempt at making a shirt for him, I think it turned out okay. I might need to fix a few things, he seemed to like it without any changes though so I'm not sure.....ideas?

3/17/2011

My Vintage Kenmore

This is my vintage Kenmore! I don't really have a name for her I call her a few things like Vinny, Kenny or Vintage Kenmore! And a few other things when I mess up.....

I bought her at a thrift store for $30 she was missing a pressure foot and some other things I wanted so I purchased more accessories on eBay for $30.
She has adjustable pressure, can drop her feed-dogs and has all the the basic stitches plus some stretch ones, without using any cams.


I put cams here to add more stitches.


The buttonholer is so easy! I hook everything up and push the pedal, yes it is that easy! The only downside is that I have to do the sizes shown on the rectangle thingy on the right, luckily I have two so I have 8-9 options to choose from.


All of my accessories are stored in this little box. The one I bought has everything! Even a nifty foot called a Q-foot, it is made for sewing with knit fabric and I LOVE it!
The discs are my cams I have more but that is all that fit in this box.


See all the stitches it can do? Some of my favorites are the fish, trees, hearts and the vines. I only did a few of them, there are just too many!
For $60 I got everything on my wish list. I know lower entry Berninas (aka Bernette) sell for at least $300 and doesn't have all the features this does! Did I mention it sews great? Well it does. I haven't had one bit of trouble with it even when quilting.


3/15/2011

Button Up Shirt Tutorial

Part 2 of different shirts you can make with one pattern.
It can be worn regular or turned up for a more modern look!


We will be using the pattern you made for the boys T-shirt.
Cut out the sleeves and back piece just like we did for the T-shirt.


The front will be different than the boys T-shirt. Cut two front pieces, piece #1 add two inches and piece #2 add 1 inch.
We will be folding over at the 1" mark, so make sure you mark where the pattern ends on both front pieces and for piece #1 the 1" mark as well.

Both Front pieces

Back piece


By adding the 1" and 2" it makes it so the shirt front can overlap and button.


Serge, zig-zag or fold over 1/4 inch, iron and fold over again on both center front flaps.


Fold over at the 1" mark and iron flat.


See how it will overlap?


Sew along the very edge of the center front piece you just serged, folded over or zig-zagged. I followed the inside right foot on my straight stitch foot.


Now we will serge or zig-zag the neck pieces on front and back pieces.


Right sides facing eachother, match the front shoulder pieces to the back piece and sew together. It should look like this when finished.


Collar
I chose to do the collar before the sleeve but you coul
d add it last.

For the collar I measured the finished neck and shoulder pieces for the approximate length add seam allowance about 1/4" and made it 3 ½" wide (this shirt is size 7).

Sorry I thought I took pictures of this part but didn't.

Fold in half right sides facing each other and sew the ends together flip so the wrong side is now inside and iron. Fold the ends in and iron so they are tucked inside the collar.

Start at one end, pin (Optional: Start 1/4" from the edge of the center front piece) and sandwich you shirt neck area in between your collar piece tucking the ends inside so they can't be seen.


See how you can't see the raw edges of the collar?


They are tucked inside.


Start at one end and sew.
I like to sew on the front so I can see what I'm doing but do whatever works for you!


Do the sleeves just like in the boys T-shirt.
Or if you sew the sides first then do that, this is just how I do sleeves.


Whew! Here we are so far!


Now match up the center of your seams, pin and sew.


When you come to the corner stop with your needle down, lift your pressure foot and turn.
Continue to the bottom of your shirt.


Ta-da! It is the shape of a shirt!


Now we get to do buttons!
I was going to make my own tutorial, but I decided that Dana had already done a great job so go here and follow her instructions.
You could just do Velcro or snaps as well.


Lastly serge, zig-zag (or fold over 1/4 " and fold over again) all remaining raw edges, fold over and sew.


You are done! Look at that nice shirt your boys can wear now!
This shirt is quite fast to make I would say about 90 minutes maybe less, I'm kind of a slow sewer!


Please let me know if this even makes sense!